
Hello all!! Thanks so much to everyone for showing the love to the new blog, especially that we’re FINALLY up and running! Now that all those pesky pre-show details are over, ’tis time to get posting again! Most of my upcoming posts will probably be about projects I’ve already completed while waiting for the site to go live, fyi.
My first one though just HAD to be about the wedding card I made for our friends Leslie and Mike. They were kind enough to get married in Mexico and invite us along – VACATION!! We were thrilled to celebrate with them. 🙂
Leslie has been my hubby’s friend for oh, I don’t know – EVER. She was actually a “groomsman” in our own wedding, actually. (And quite possibly the most badass of the groomsmen as well.) So there was no way I couldn’t make her wedding card, and make sure it was extra special. So I lovingly present my creation, all thought up in my own lil punkin’ head – and I adore it. Modesty aside (not that I’ve shown any yet), I almost didn’t want to give it to her. But I’m not that brave. Love you Leslie – er, Mrs. Howard! 🙂
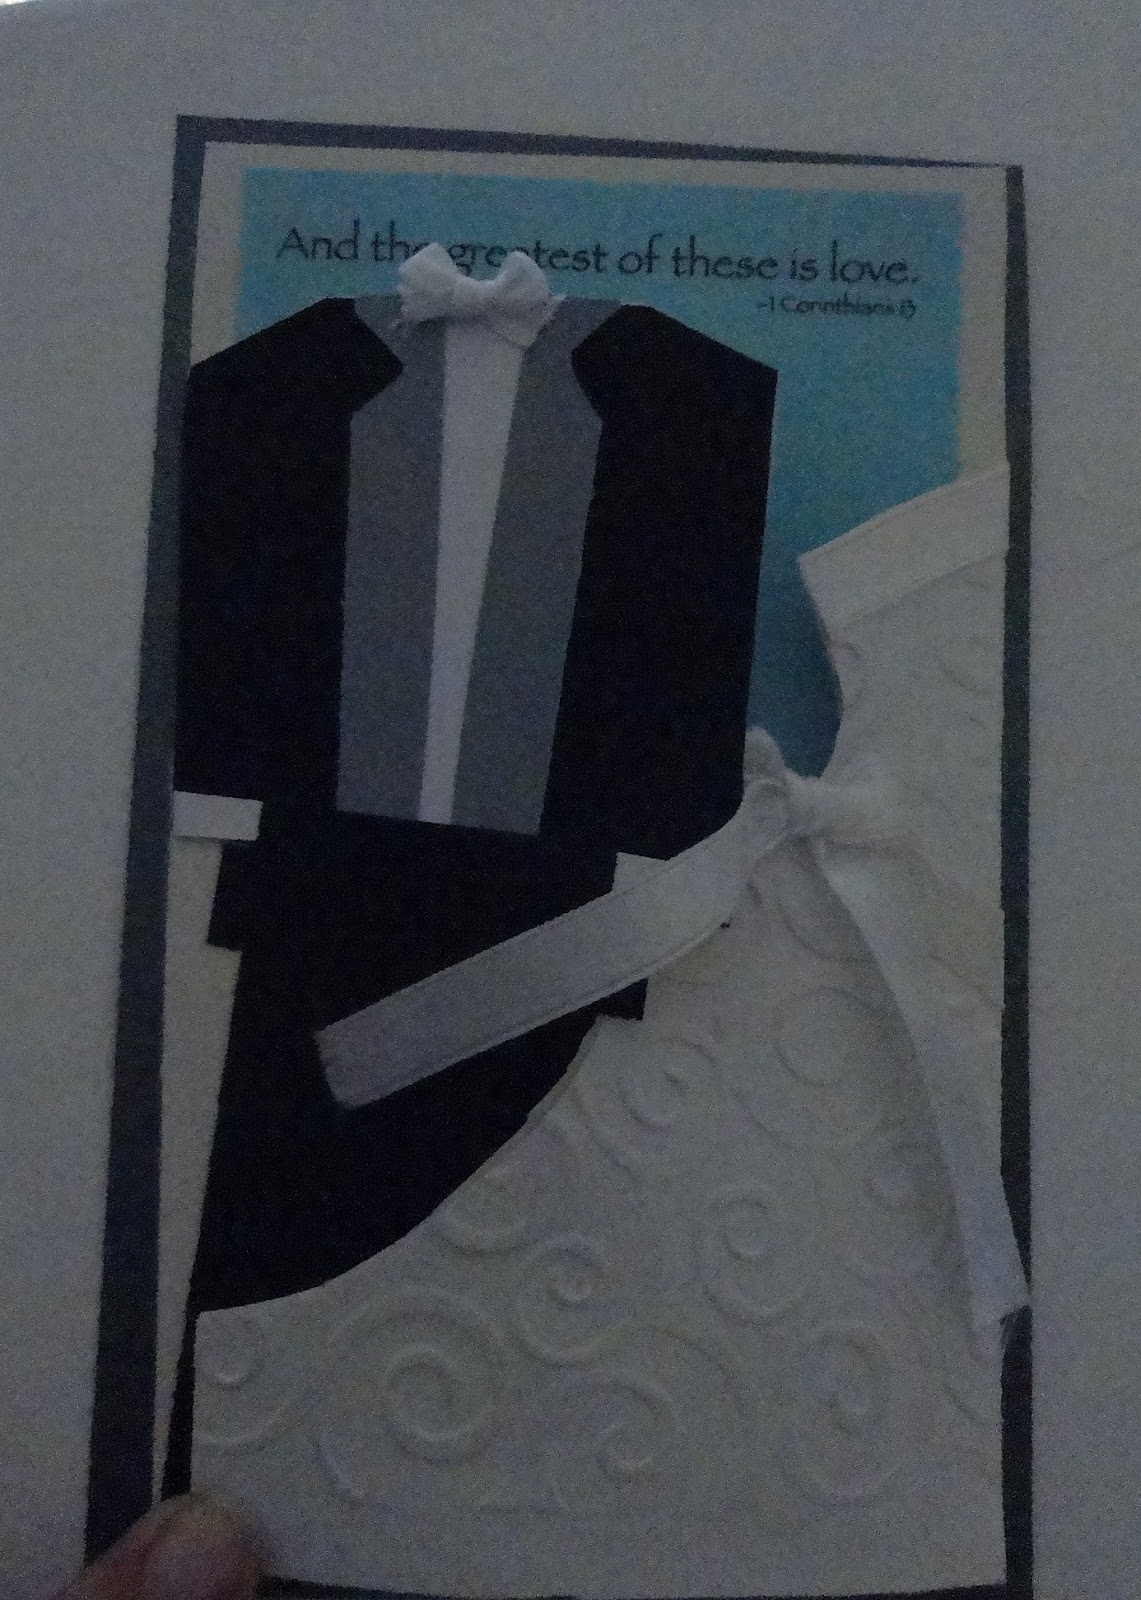
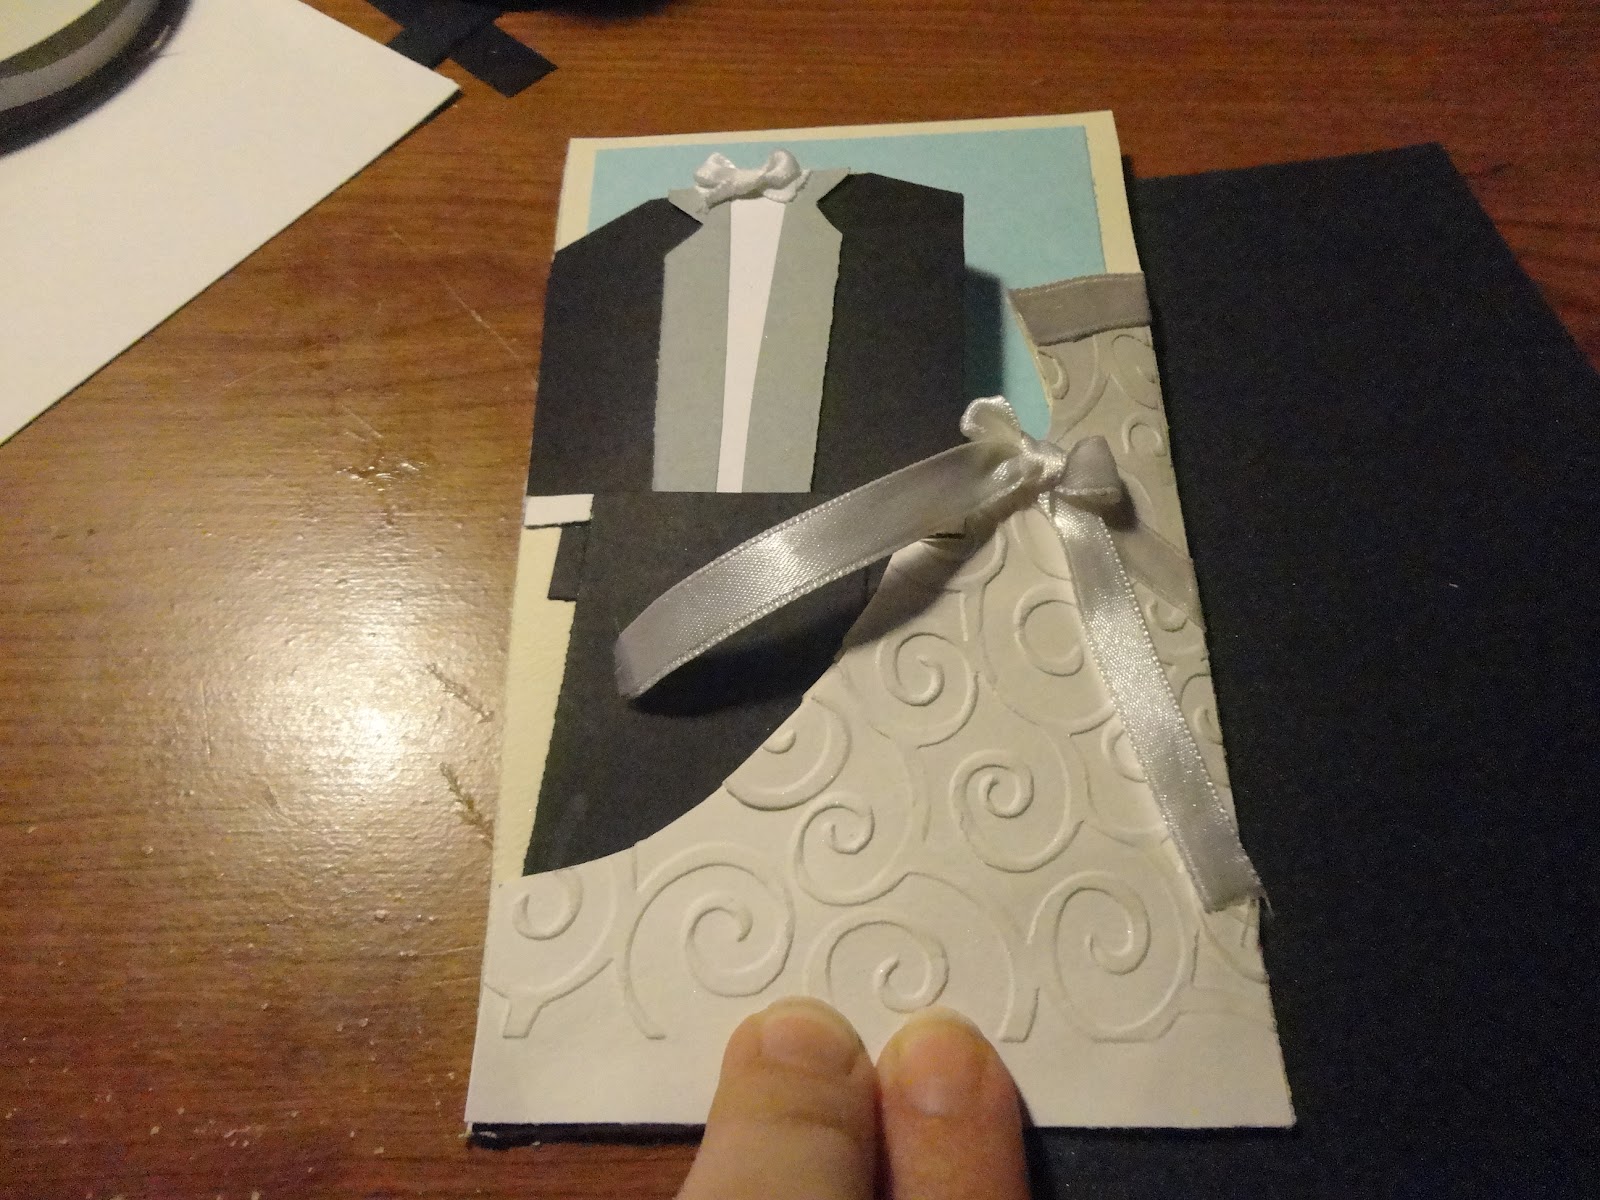
Please ignore my finger – the card “doors” are the bride and groom, and they were tough to keep closed directly after finishing. Also, please excuse the less than stellar photos – I’m working on my skills. 🙂 \
Materials
12×12 Ivory Cardstock
Cuttlebug D’Vine Swirls Embossing Folder
Blue cardstock
Black cardstock
White cardstock
White Satin Ribbon
Pearl Ex Macropearl
Acid-free Perfect Medium Clear Stamp Pad
Martha Stewart Scoring Board
Elmer’s GlueStick
Spray Adhesive
*Please forgive the crummy pictures. I’m getting better!
Tutorial
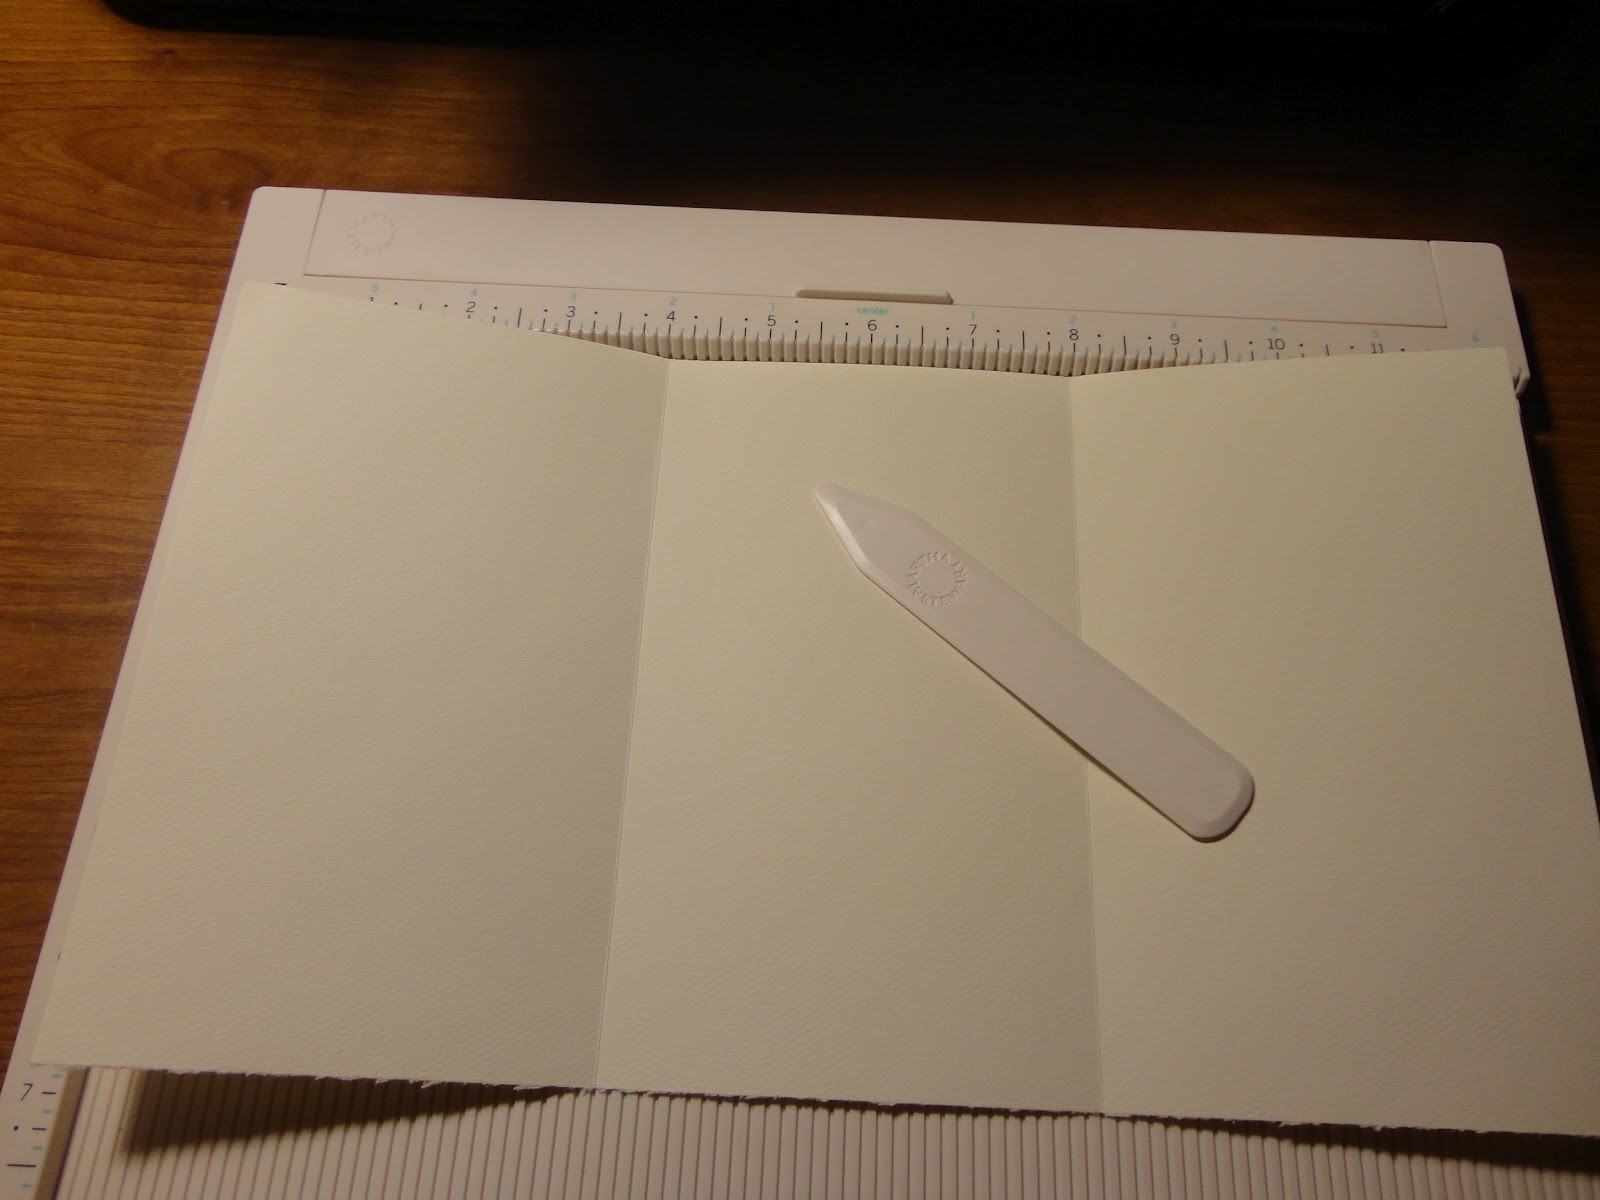
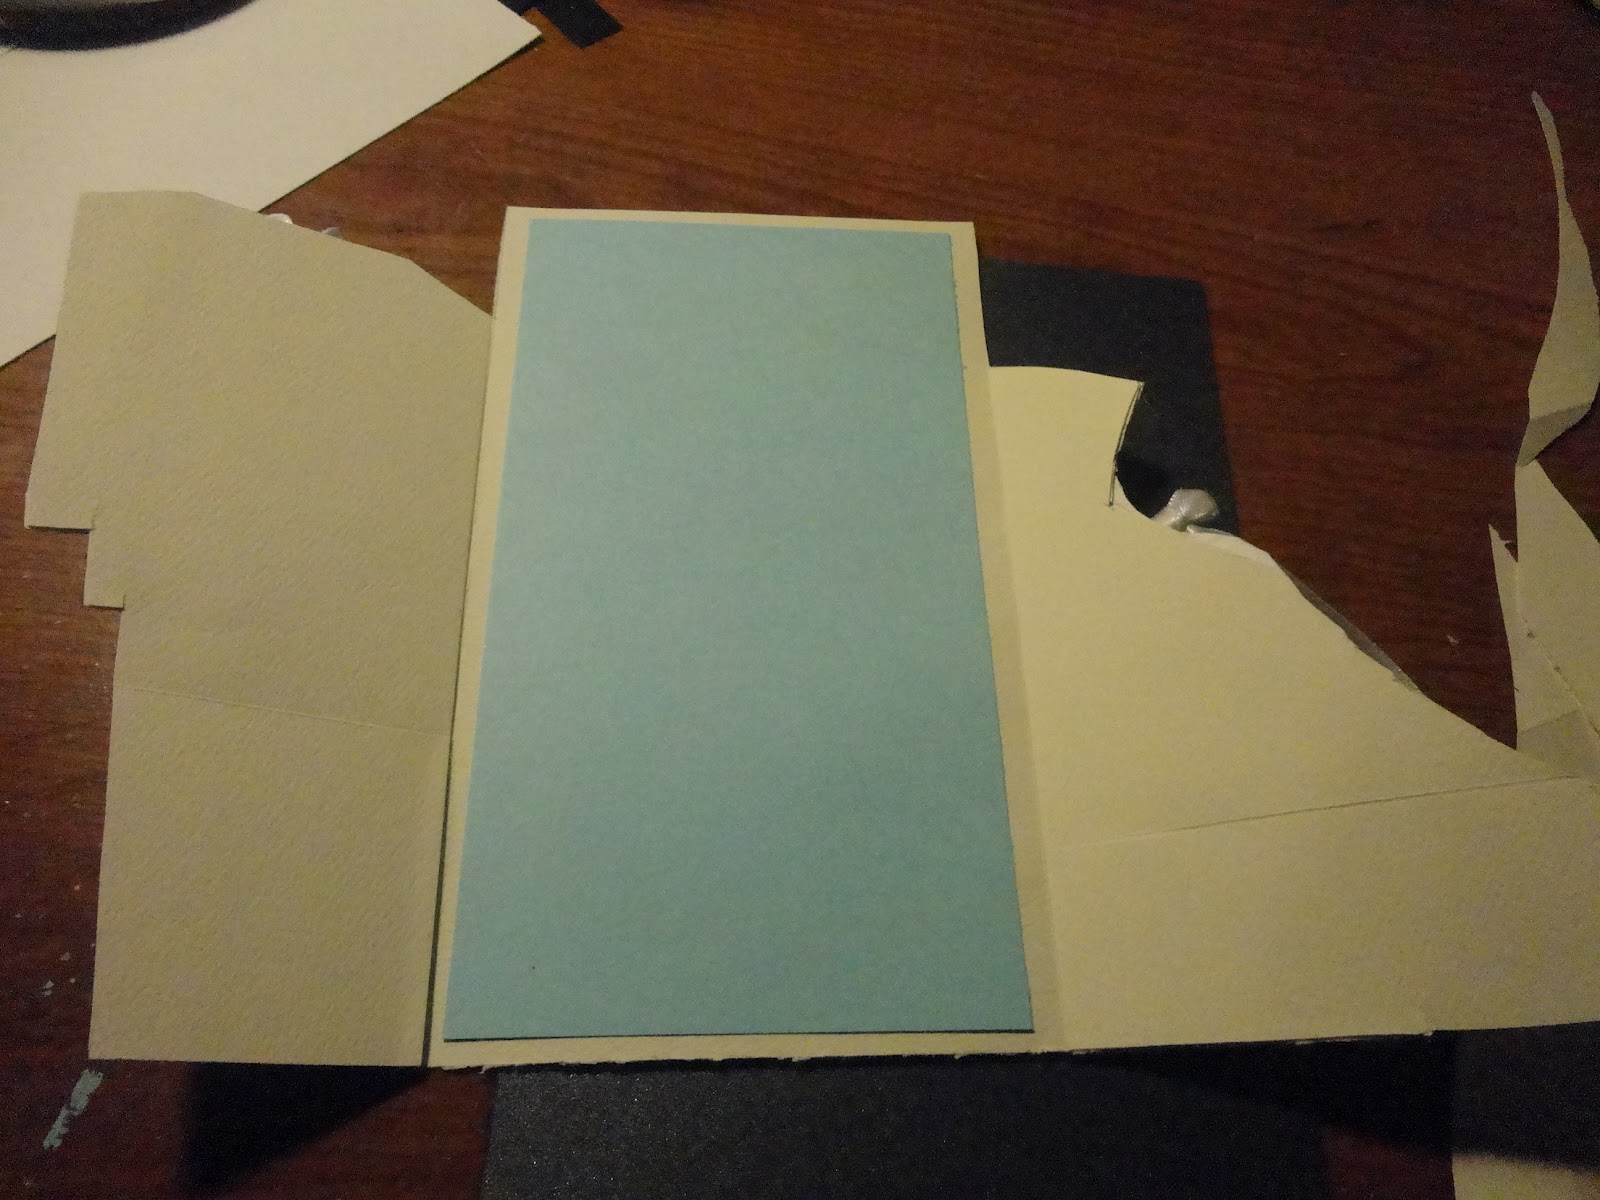
1. 12×12 Cardstock, trimmed at 12×6 and scored on the 4″ and 8″ mark. Fold as Trifold, inward.
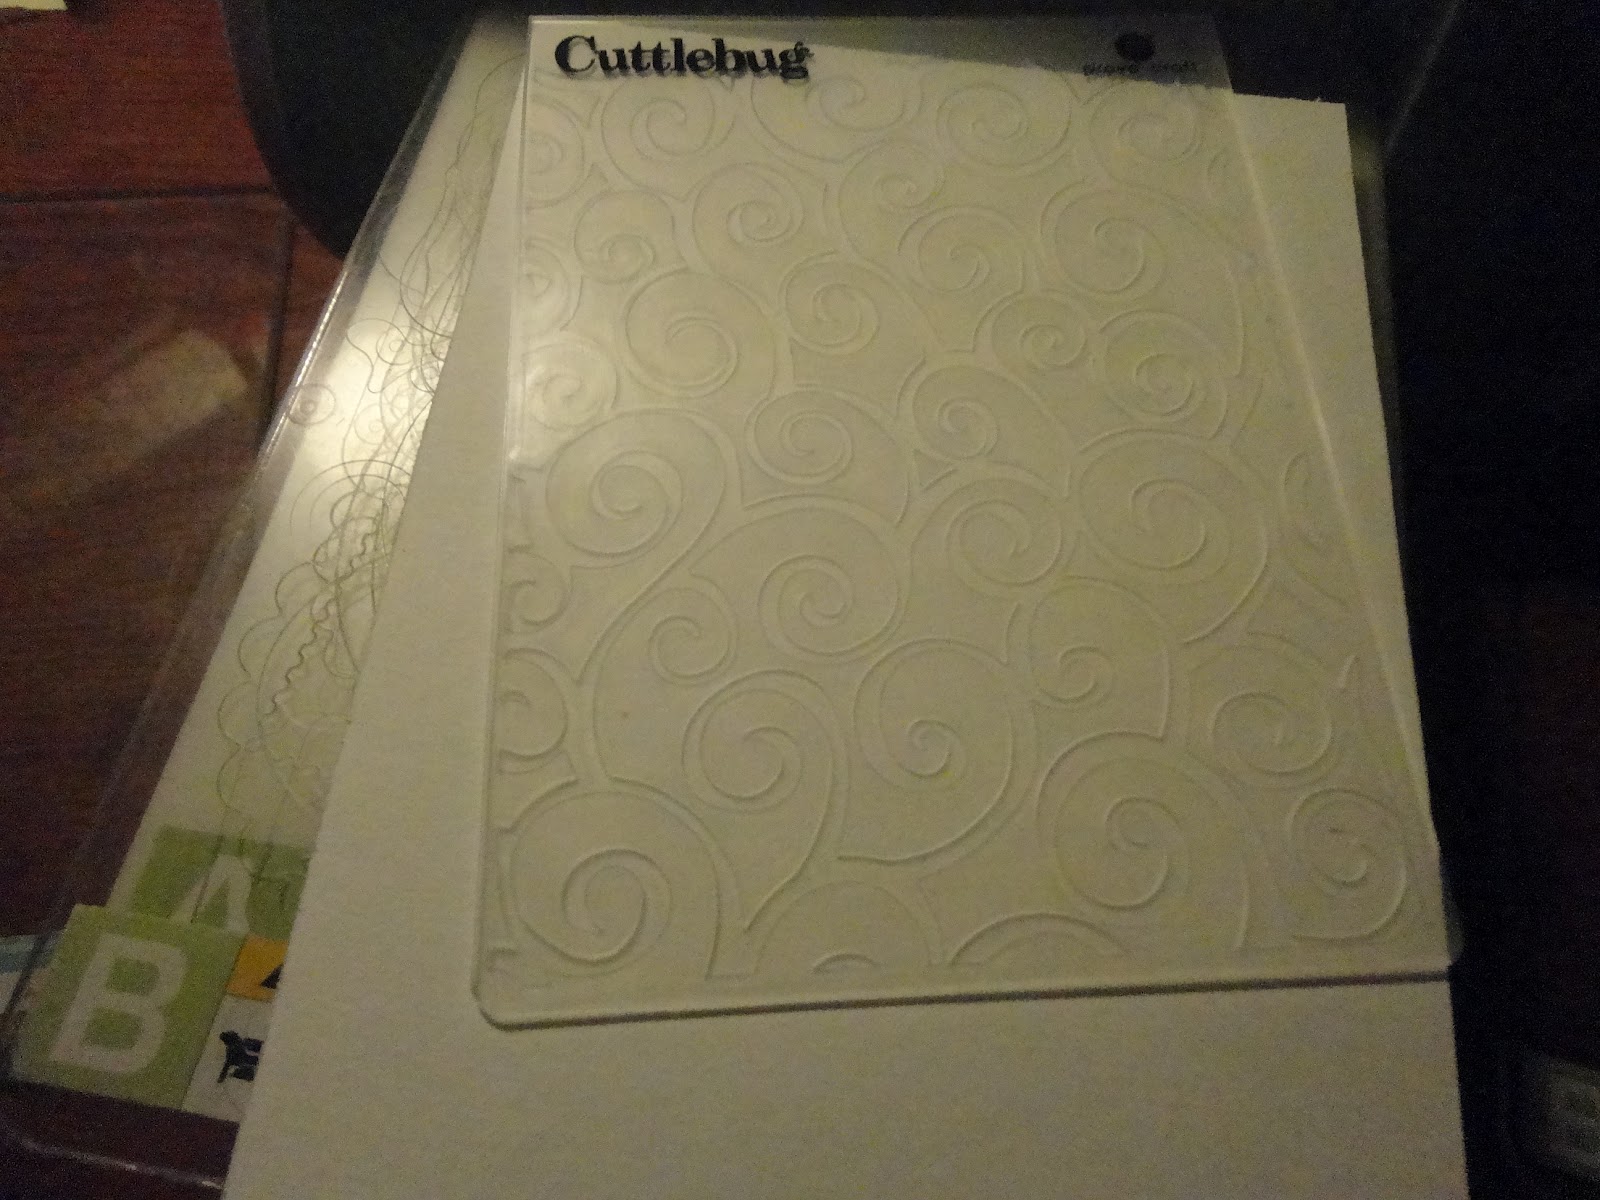
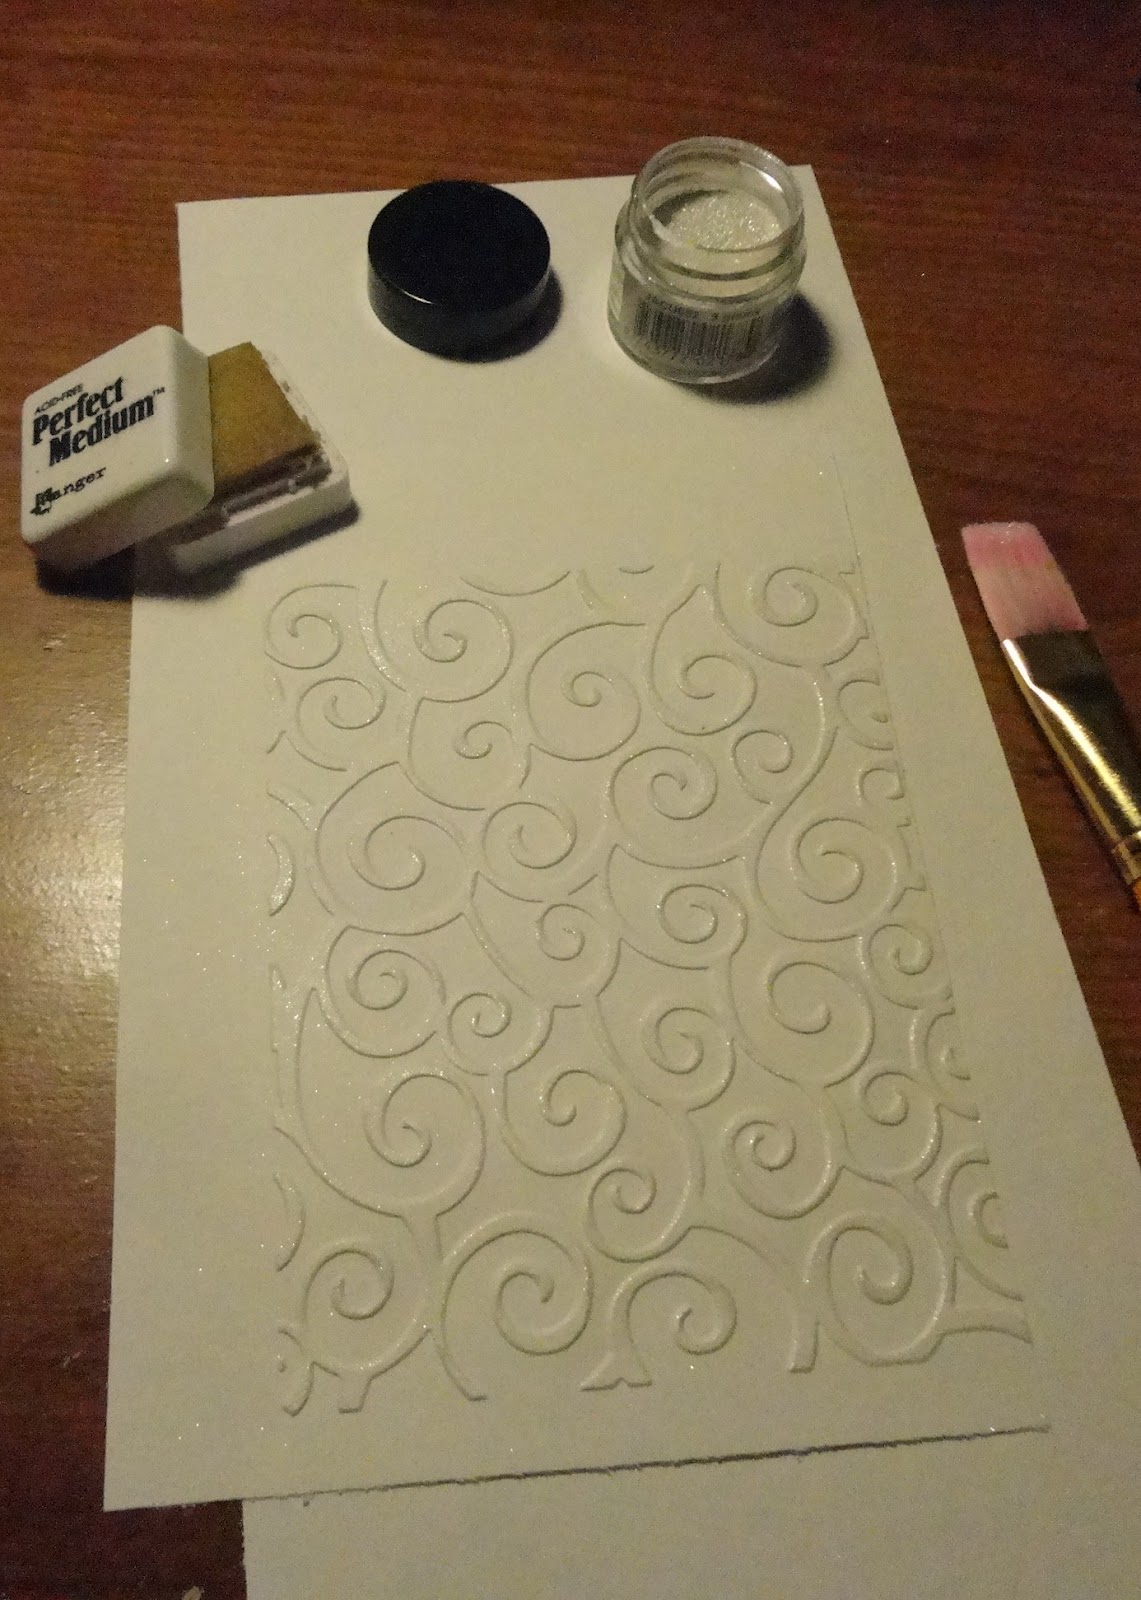
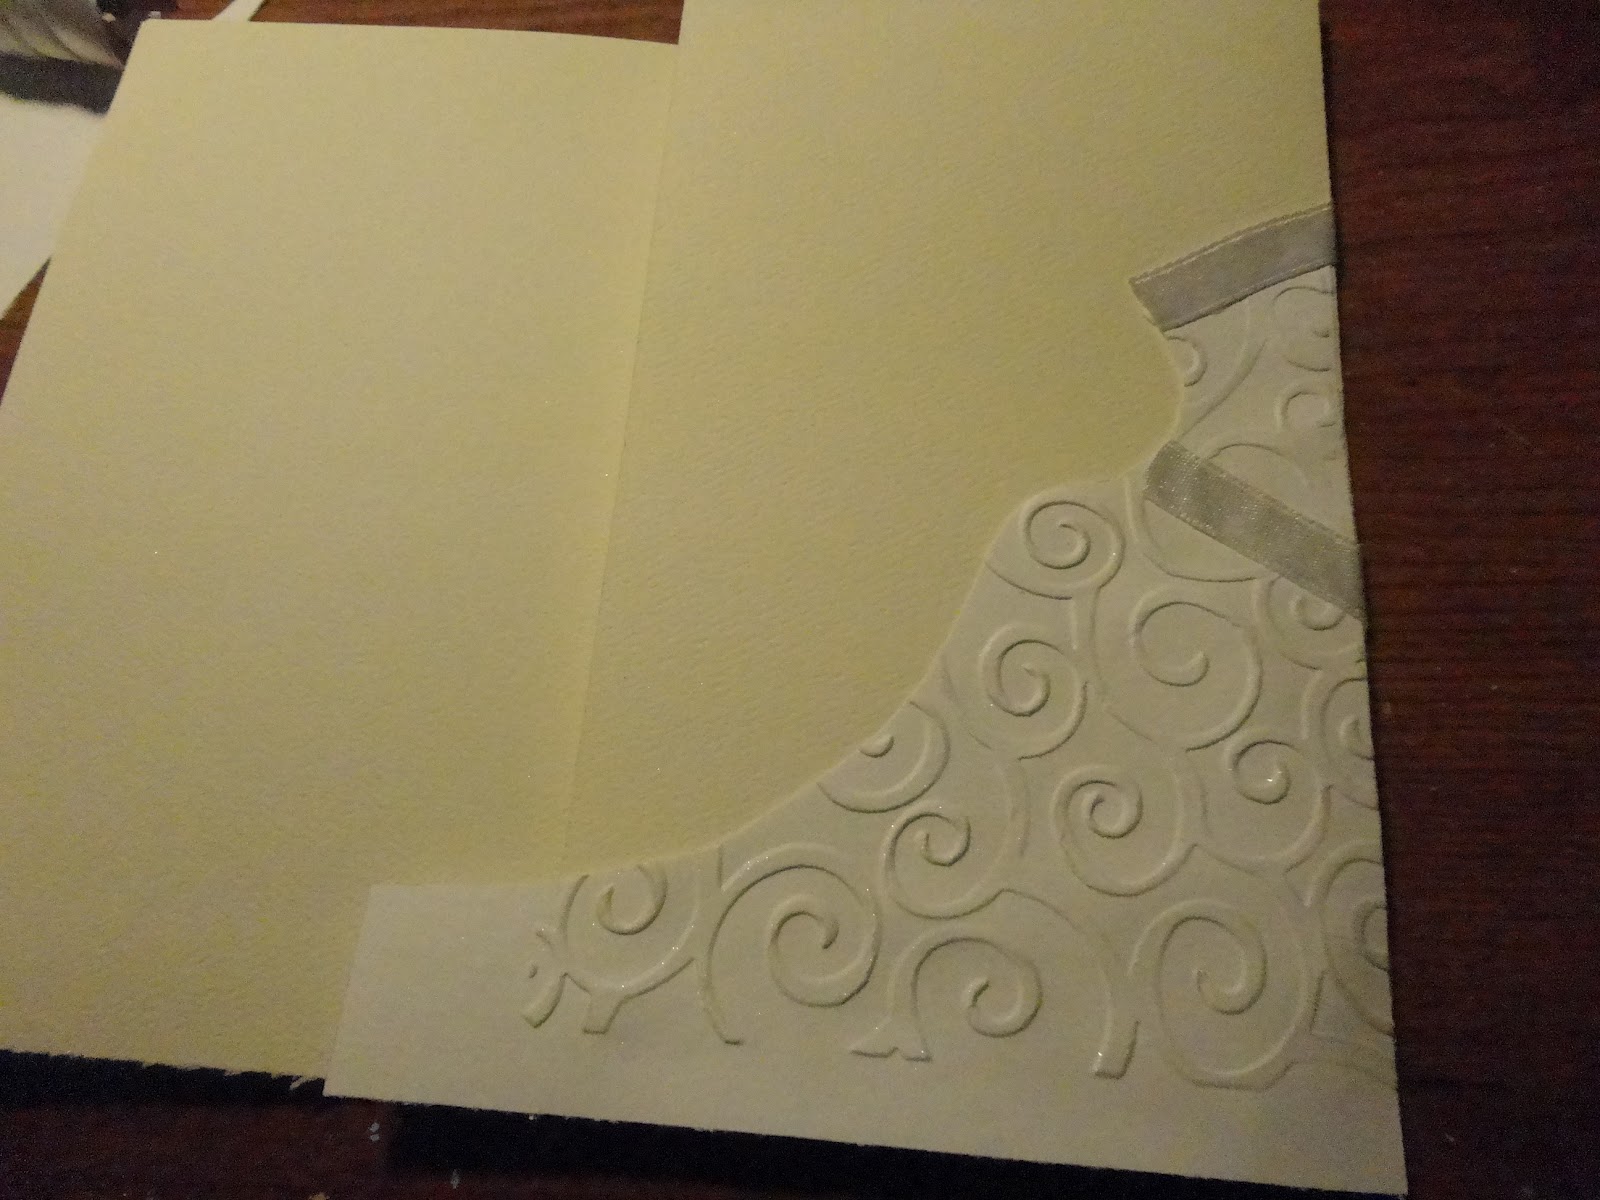
2. On a white piece of cardstock, about 4×6, run through Cuttlebug in D’Vine Swirls folder. Stamp perfect medium lightly over raised surface and brush with Pearl Ex Macropearl.
3. Here comes the hand-craft part. 🙂 I trimmed the embossed card stock by hand into what resembled a wedding dress for me, using the right and bottom sides as the base, to fit over my tri-fold card. Using small strips of white satin ribbon and plain old Elmer’s Glue Stick, I added ribbon lining to help delineate the actual dress. After trimming the train to fit the outside of the tri-fold card, I attached it using spray adhesive to ensure a good stick. After attaching the dress, I trimmed the outside of the tri-fold card to fit the dress.
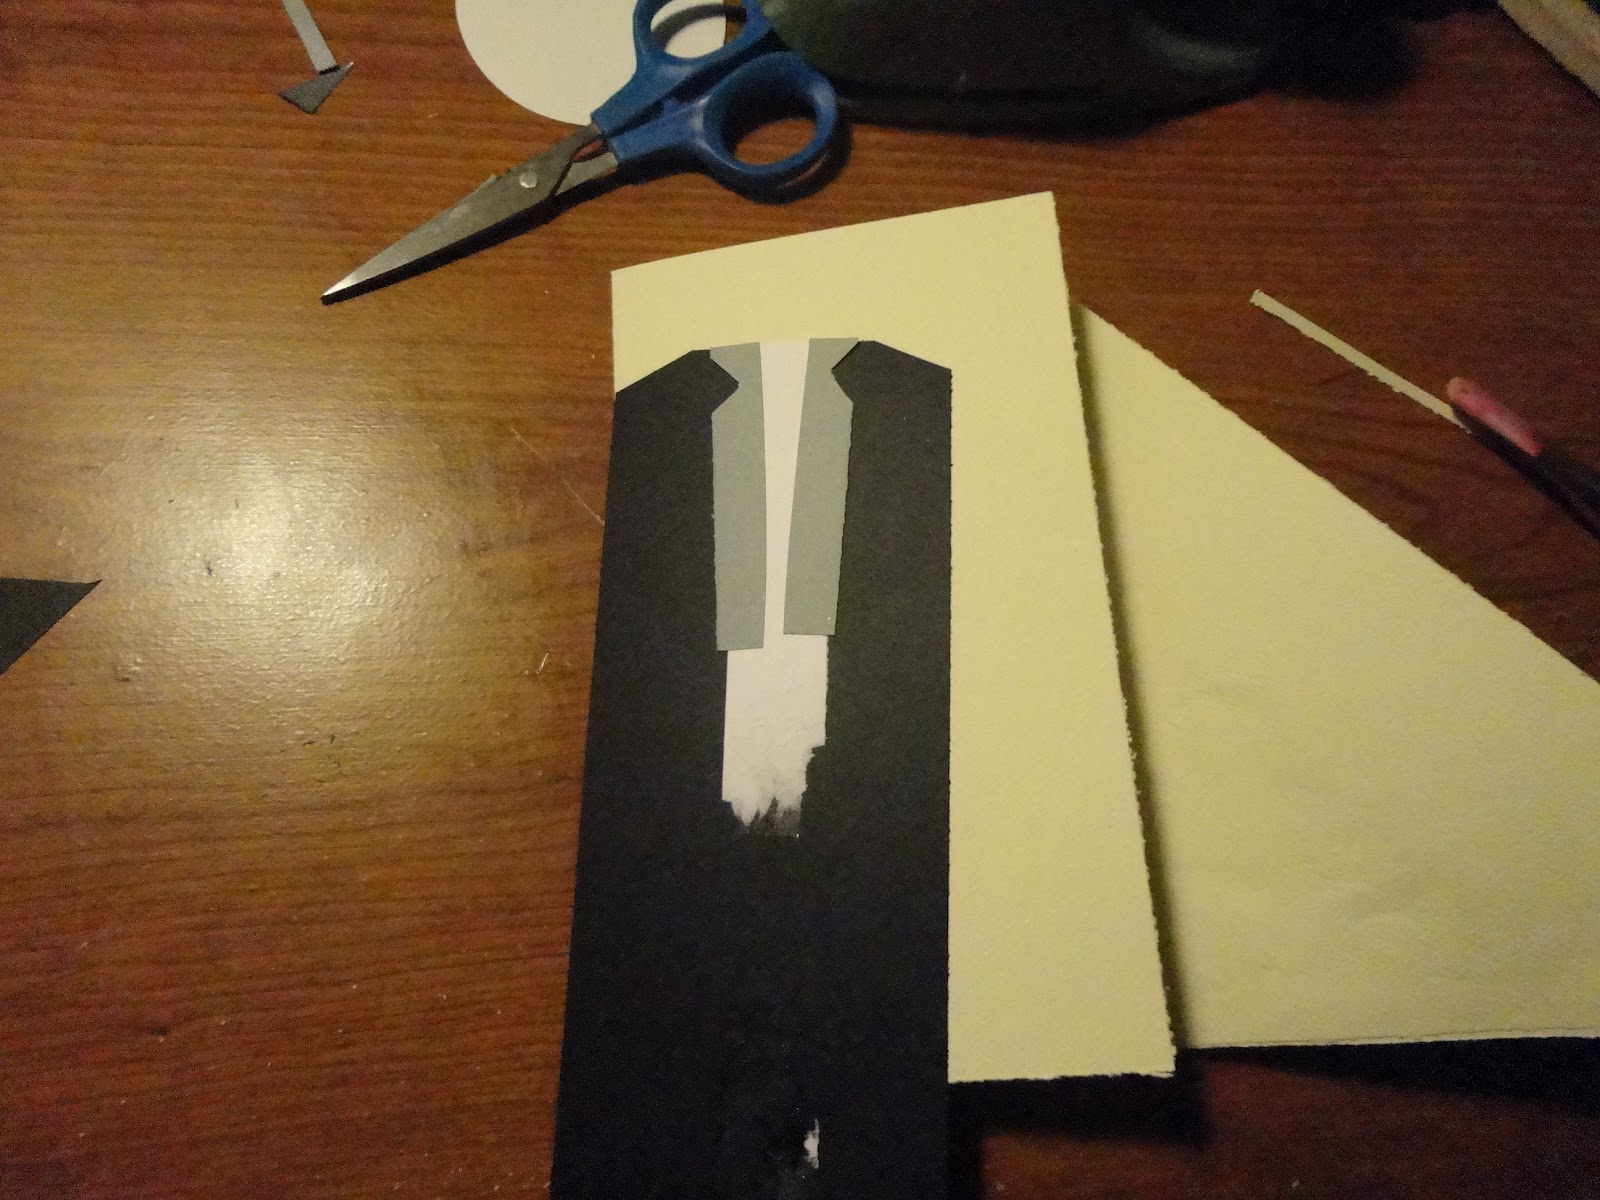
4. Repeated the same general idea on the left side, using black and white scrap paper to outfit a tuxedo and vest. Again, trimmed the card to fit under my tux after adhering it securely. Once the “bride and groom” were in place, I trimmed a piece of light blue card stock to fit the inside, waiting for the sentiment. Also added a tiny ribbon bow to my tux, and a larger bow to my dress’ bustle. Adhered with liquid Elmer’s for a better stick.

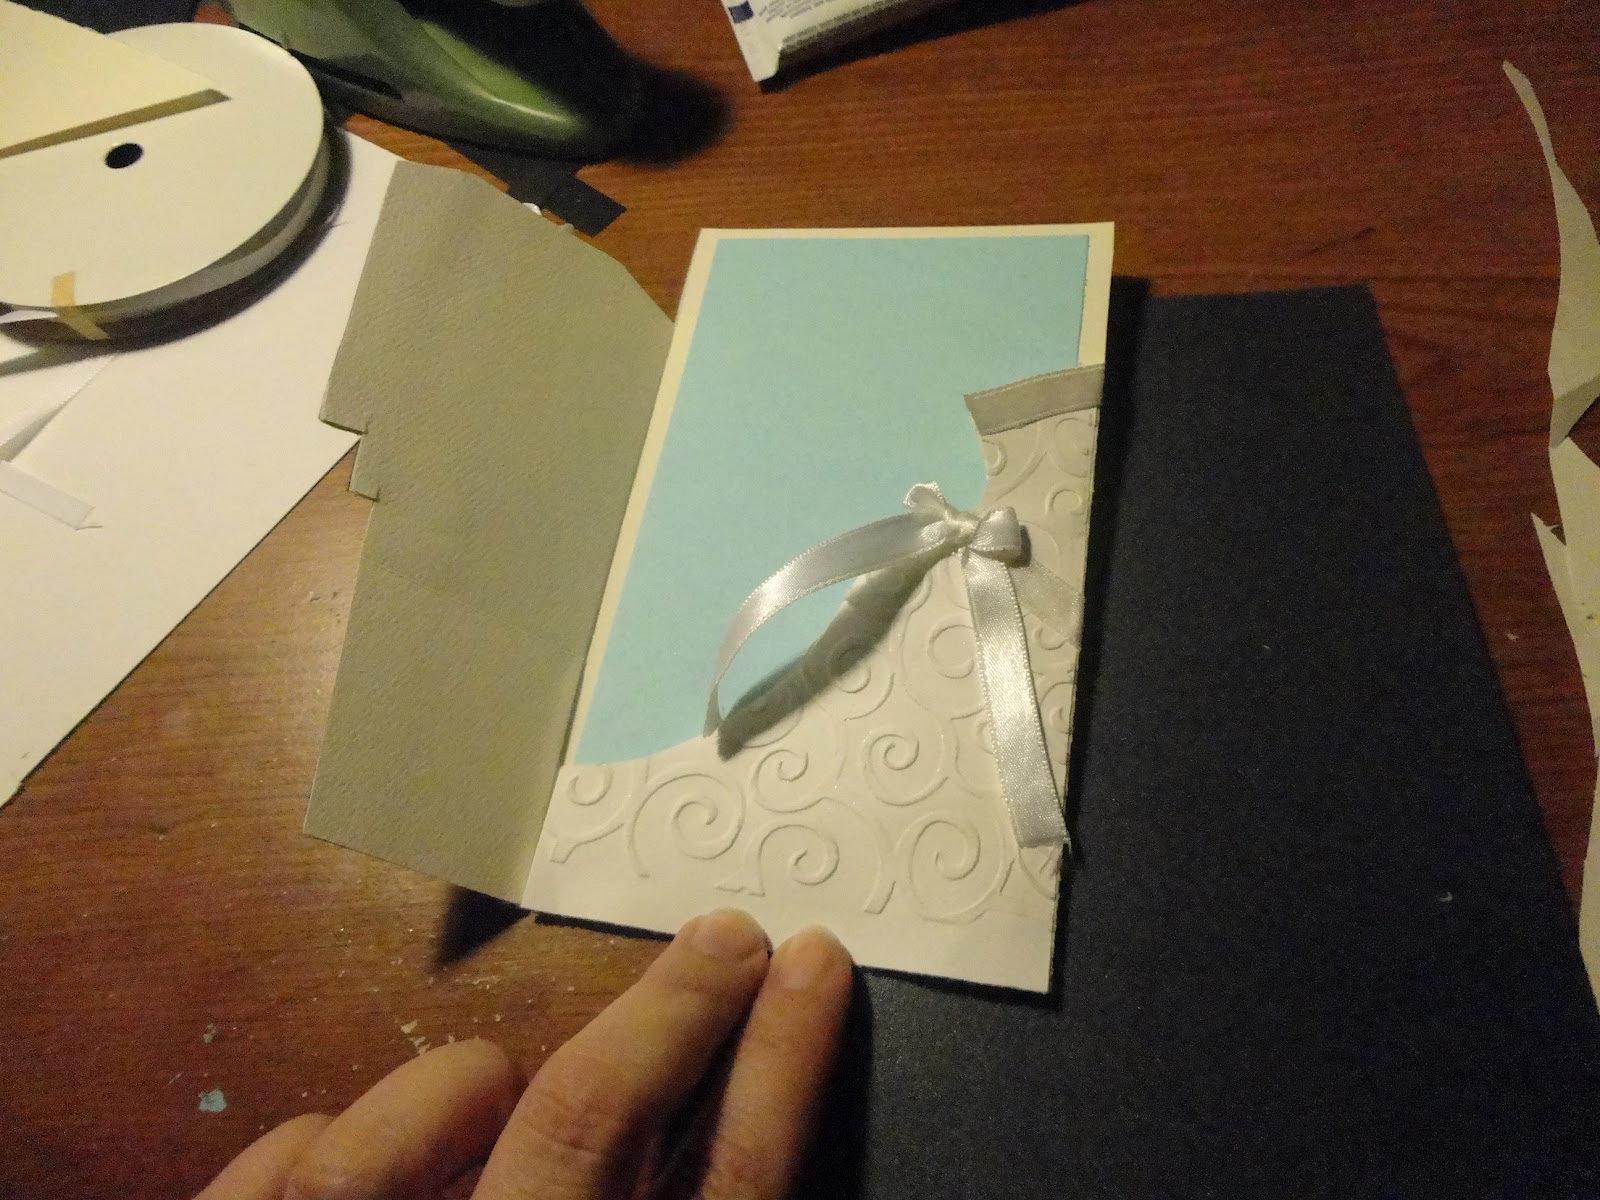
5. Lastly, I adhered a a clear sticker with a Corinithians quote – I can’t recall where I got it, it was in my supply from before I started organizing better. 🙂 Also, please ignore my fingers in all the pics – tough to keep this guy closed! 🙂

One comment