Skip to content
  • Home
  • About
  • Tutorials
    • DIY Decor
    • Card Making
    • Disney
    • Kids Crafts
    • Parties
      • Grown Up Parties
      • Birthday Parties
      • Disney Parties
    • Holidays
      • Christmas
      • Father’s Day
      • Mother’s Day
      • Halloween
      • Valentine’s Day
      • St. Patrick’s Day
      • Easter
    • Food & Drink
      • Appetizers
      • Drinks
      • Breakfasts
      • Lunches
      • Dinners
      • Soups
      • Side Dishes
      • Salads
      • Desserts
      • Low Carb
  • Freebies
    • Free Printables
  • Shop
  • Home
  • About
  • custom-logo
  • Tutorials
    • DIY Decor
    • Card Making
    • Disney
    • Kids Crafts
    • Parties
      • Grown Up Parties
      • Birthday Parties
      • Disney Parties
    • Holidays
      • Christmas
      • Father’s Day
      • Mother’s Day
      • Halloween
      • Valentine’s Day
      • St. Patrick’s Day
      • Easter
    • Food & Drink
      • Appetizers
      • Drinks
      • Breakfasts
      • Lunches
      • Dinners
      • Soups
      • Side Dishes
      • Salads
      • Desserts
      • Low Carb
  • Freebies
    • Free Printables
  • Shop
Art

DIY Portrait Wall Hangings

January 7, 2013June 9, 2014 Megan 26 comments
DIY Portrait Wall Hanging
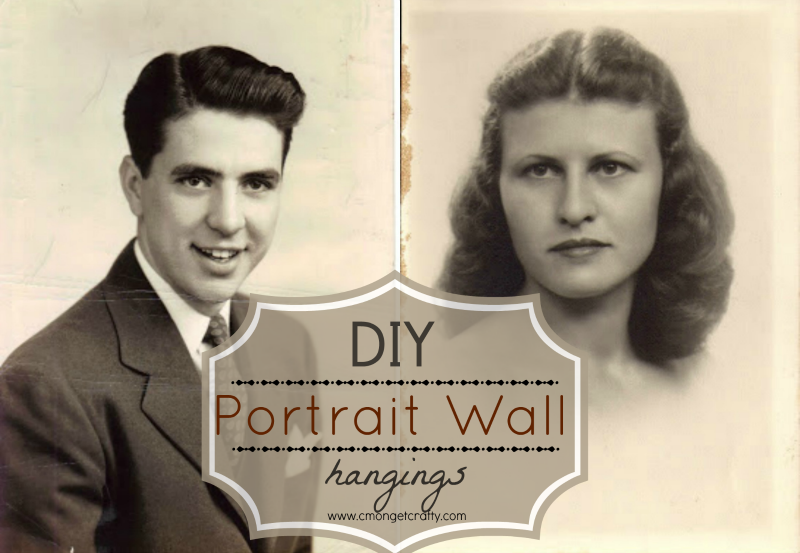
 Early last year, I came up with what I thought would be a nice gift for my mother, and a chance to play with picture crafting ideas. In a hybrid of Pinterest-y ideas, I decided to try to put my grandmother and grandfather’s portraits on canvas for her.
SPOILER ALERT: It did not end well.

Well, at least not the first time.
 
Lemme back up – the first challenge was taking the photos I wanted to use, and making them useable. These are some old portraits of my grandparents when they were young, and since I wasn’t about to mess with the originals (as though ANY member of my family would have let me), I had to work with scanned images of photos that were already not in stellar condition. These are the originals:

DIY Wall Portrait

I think we can all agree that my grandparents were pretty good-looking people, right? 🙂
 
So you can see a few issues to start – Pa has creases in his photo, Nana’s has water stains, neither of them is the same size, portrait-wise, nor the same ink tone and color. This is why I love applications like Picnik, which is what I used at the time. (Now that Picnik is defunct, I use Picmonkey, and it is just as amazing and cost-effective – free for basic edits, and $5 monthly for all the premium stuff!)
So, using the online application, I modified the above portraits to these:

DIY Wall Portrait

Not a complete success in changing the ink colors, which at the time I didn’t notice, likely because I only made Nana’s portrait first, and my mother requested Pa’s after. I’ve combined them in this blog for time’s sake.
So then I set about putting Nana to canvas, using a 12 x 12 canvas, scrapbook paper, ink, and modge podge. Here’s a work in progress:


DIY Wall Portrait
 
 Ew.
 
 I was a little concerned about the shiny finish of the modge podge as well as the slight bubbling and wrinkling that I saw, but I pressed on. Patience, I have little of thee. One of my many flaws, I’m afraid. I had used Tim Holtz Distress ink in a combo of Wild Honey and Vintage Photo  and smudged it all across the portrait, hoping to blend the white paper with the tan scrapbook background, and create a more seamless look. My other issue was that, while my scrapbook paper covered the whole canvas, Nana was an odd size portrait, and it looked a little strange just sitting there like that. So I tacked on some ribbon, hoping it would look better:


DIY Wall Hangings

“Not a total Betty, but a vast improvement.”

 
I actually really loved it when I finished it. I gave it to my mom for Mother’s Day, and she claimed to love it as well, which was when she asked for Pa, to complete her wall hanging. So here’s Pa, in progress:


DIY Wall Portrait


DIY Wall Portrait


I sent my mom a picture of the in-progress work, and she pointed out a flaw – Pa was a full portrait, Nana was just a head. She thought it would look weird, and damn if I didn’t agree once she’d pointed it out. So I started over, went back to Picmonkey, and shaved off a bit of his suit. Here was the final result:


DIY Wall Portrait


I hated it. I did not think it looked anywhere near as nice as Nana’s but in a moment of weakness, I sent it off to my mother anyway. But I wasn’t happy. And later, when I asked her to send me a pic of how they looked together, she admitted she hadn’t hung them, as they are started to appear….wrinkly. At my urging, she sent me some photos to show what she meant:


DIY Wall Portrait


DIY Wall Portrait


DIY Wall Portrait


Ew, ew, EW!!  Once I saw the damage, I promised her I’d redo them, to BOTH of our satisfaction.
 
But how?
 
I decided the main issue was the combo of the modge podge and the canvas. It was just not a firm enough background to adhere the papers to, making it very difficult to get a clean transfer. So I decided to try one of the wooden box frames I’d seen at Michaels ere and there. I also cut out the modge podge in favor of a double-sided tape adhesive, which I ran rampant with all over the back of the papers.
 
Since I was doing both at the same time this go around, I also noted the differences in the images, and determined to fix those as well. Thanks to Picmonkey and a wonderfully sweet man at the Walgreens photo center, I ended up with these:


DIY Wall Portrait
So much better!!!  I had the devil of a time getting them sized to match, and this is where I owe a big shout out to Wade at the Walgreens  for being so creative and patient with me! 🙂
 
So now, armed with new papers, new photos, and a new adhesive plan, this is the final product, which my mother was given (again) for Christmas:
 
DIY Wall Portrait


She has now requested one of her grandparents to fill in the gaps. 🙂


Do you do any kind of portrait gallery in your home?


C'mon Get Crafty


footer


Top Mommy Blogs - Mom Blog Directory

Savvy Southern Style

 I love linking up at these parties , and at House of Rose!
About Megan

About Megan

I'm Megan, the crafty brain and sarcastic soul behind this little paint splotch on the interwebs. I drop movie quotes daily while juggling the corporate cold with the joys of boy mom life, all while trying to squeeze in crafty time for my soul. Welcome to my world!

Post navigation

Dollar Store Ornament Wreath DIY
Playing with Paint: Subway Art

Spill the Glitter & Share Your Thoughts Cancel reply

Your email address will not be published. Required fields are marked *

Recipe Rating


This site uses Akismet to reduce spam. Learn how your comment data is processed.

Search

Hey you!

Hey you!

Megan, Duchess of DIY

Welcome to my blog! Here you'll find tips and tutorials for finding creative solutions (and free goodies!) for everyday life events! Plan unique parties, organize the everyday, and decorate your home with a DIY flair! I love pop culture, Disney, and spending time with family - let's craft a life you'll love!

Now in the Shop

Let's Browse
Now in the Shop

Follow @cmongetcrafty

Be yourself. Everyone else is already taken.

Oscar Wilde
  • Work With Me
  • Disclosure and Privacy Policy
  • Shop
  • Pinterest
  • Facebook
  • Instagram

C'mon Get Crafty

C'mon Get Crafty © 2025 | All Rights Reserved |