This is an easy craft to do and a fun #ElfontheShelf idea to boot! This elf sized snowman makes for a cute morning surprise! #12DaysofChristmas

Every December, our Elf on the Shelf (affectionately known as Fred) shows up ready to live his best, most chaotic little life. He’s basically a tiny houseguest who doesn’t pay rent but fully commits to the bit. If you’ve seen my post about his past antics, you know the man has range! Snowball fights, cookie crumbs everywhere, questionable life choices. He’s a whole mood.
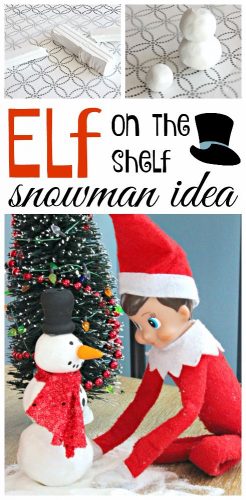
This year, the boys absolutely lost it when Fred built himself an elf-sized snowman.
Yes, an indoor snowman.
Yes, I’m still sweeping up fake snow. Worth it.
PSST – I use affiliate links on my website, from Amazon as well as others – this means if you click my links, I may earn a little money at no cost to you! As an Amazon Associate I earn from qualifying purchases. I appreciate your support of my blog, and if you have questions, you can see my disclosure policy here. Thank you!
Welcome to the third annual 12 Days of Christmas Blog Hop!
From December 1st through 12th, bloggers across the internet turn into caffeinated elves and bring you fun, creative, festive ideas. Crafts, recipes, décor, kid projects, all the things. You’re basically walking into the ultimate holiday Pinterest board, but curated.
Stop by every day for new ideas you can use to make your season brighter!
Meet Your Hosts
They have all been busy as Elves creating, decorating, cooking and crafting tons of new ideas for you to try this holiday season!
Shirley~Intelligent Domestications I Alli~An Alli Event I Michelle~Our Crafty Mom I Marie~DIY Adulation
Erlene~My Pinterventures I Beverly~Across The Blvd. I Debra~Shoppe No. 5 I Victoria~Dazzle While Frazzled
Megan~C’mon Get Crafty I Michelle~Michelle James Designs I Amanda~Domestically Creative
Deborah~Salvage Sister & Mister I Jeanie~Create & Babble I Sherry~Olives & Okra
Jenny~Cookies Coffee & Crafts I Emily~Domestic Deadline I Bonbon~Farmhouse 40 I Susanne~Pearl Street Designs
Leanna~Of Faeries & Fauna I Pam Larmore~P.S. I Love You Crafts I Kelly~North Country Nest I Marie~The Inspiration Vault
Gail~Purple Hues and Me I Lynne~My Family Thyme I Karen~Dragonfly and Lily Pads I Trisha~Blowing Away Out West
Tomika~Life In Pumps I Rachee~Say it, “Rah-Shay” I Lorrin~Embrace The Perfect Mess
Serena~The Weekend Jaunts I Terri~Christmas Tree Lane I Jessica~A Southern Mother
Dru~Polka Dot Poplars | Sam~Raggedy Bits I Cyn~Creative Cynchronicity
Valeria~Val Event Gal I Yami~The Latina Next Door I Jeannee~Centsably Creative I Tania~Little Vintage Cottage
Lauren~Wonderfully Made I Vanessa~DIY 180 I Kimberly~A Wonderful Thought I Kim~Everyday Parties
Now let’s make a tiny snowman that your elf will take all the credit for
This project is adorable, cheap, and even mildly therapeutic. Plus, it gives your elf the perfect prop for a little overnight mischief!
Supplies
- Polymer clay
- Acrylic paint
- Small fabric scrap or thin ribbon
- Toothpick
- Small wooden mushroom knob (for the hat)
If you don’t have a wooden knob, or want to buy one, you can shape a hat from clay or skip it entirely. Your elf won’t judge.

Step 1: Warm the clay
First up, you have to knead your polymer clay until it softens. Roll three balls in descending sizes (large, middle, and small) for the body. Nothing too perfect. Snowmen are supposed to look handmade. It adds charm!
Roll one small cone for the carrot nose and set it aside. Bake this separately so it doesn’t overcook.

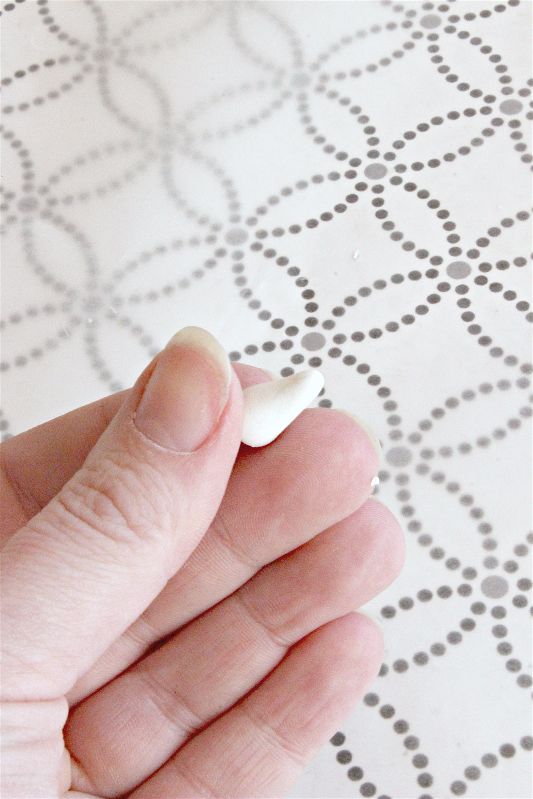
Step 2: Stack the body
Slide a toothpick through the center to help the snowman hold his shape. It’s optional but helpful if your winter wonderland involves curious kids who like to poke things. I wasn’t sure if it was necessary, but I didn’t want his head to roll off!
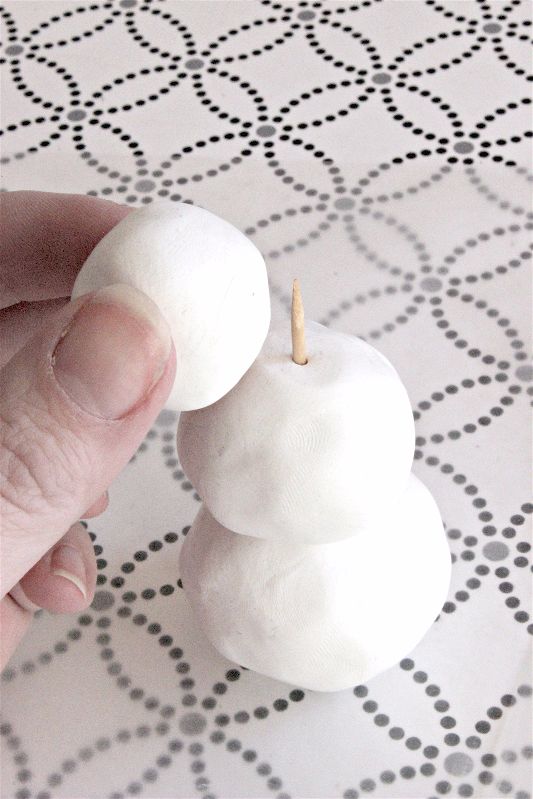
Step 3: Bake your snowman
Preheat the oven to 275°F. Bake 15 minutes per ½ inch of thickness. Mine needed about 35 minutes. Let it cool completely before painting.
If any spots brown slightly, don’t panic. We cover that in the next step.

Step 4: Paint the details
- Paint your wooden knob black to create the cutest little top hat.
- Give your snowman a quick coat of white acrylic to brighten him and cover any browned spots.
- Add eyes, a smile, and buttons with black paint.
- Hot glue the carrot nose in place and paint it orange.
I had this little wooden knob in my crafty stash {which I why I started my Crafty Destash Challenge, I have too many odds and ends!}. Finding this little knob is actually what inspired my elf sized snowman, because I thought it would make a great little top hat! Just paint black!

Suddenly he has personality! And it’s adorable.

Step 5: Add a scarf
Once all the paint has dried, cut a thin strip of fabric or ribbon and tie it around his neck. Add a couple of hot-glue dots to keep it in place.
Props make everything better. Even tiny polymer-clay snowmen.

Step 6: Set the scene
Sprinkle some faux snow or white craft sand on your table, set your snowman in it, and proudly position your elf beside his masterpiece. Add a little note if you’re feeling theatrical. (Fred would absolutely leave a note that says “Nailed it.”)
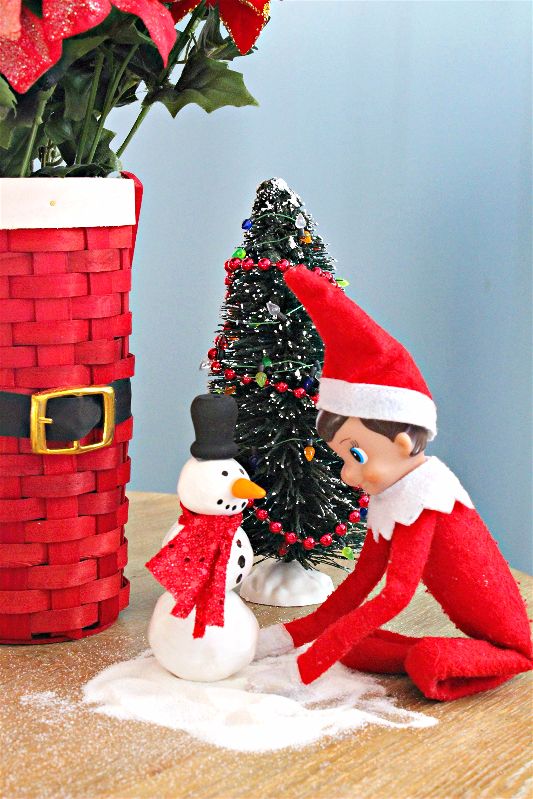
The boys were enthralled by Fred creating a snowman inside the house, especially such a little one! I love the joy on their little faces when they find Fred has been having fun in the night.
Seeing that little spark of holiday magic in their faces is exactly why I’ll keep making tiny props for a tiny man with a felt body.
If you recreate this project, tag me so I can cheer on your elf’s questionable nighttime decisions!
You can also plan and track your elf’s exploits in the FREE ELF ACTIVITIES PLANNER!
Be sure to visit our fellow 12 Days of Christmas Bloggers below for even more creative ideas this holiday season!
what a cute idea!
Tania
Love this! I need to give our elves some Christmasy props. Visiting from 12 Days of Christmas.
How cute is that idea! I’ll bet your kids were excited to see that snowman inside!
Our elves might be building a snowman soon!
He does have the perfect little top hat and quite the handsome friend as well. Really cute idea.