Sláinte!!
Happy St. Patrick’s Day everyone!! On this fabulous holiday, I thought I’d share with you a bit of Irish decor and a quick how to! I’ve got a fun and easy DIY for you — a St. Patrick’s Day Wood Sign that’s perfect for adding a festive touch to your home.

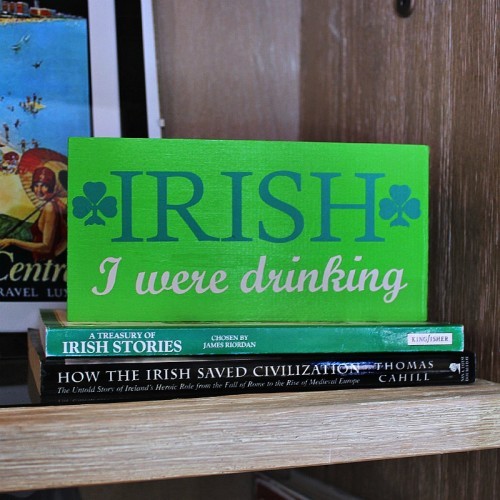
I actually made these last year, and one of them was a gift for my Irish bestie. Naturally, I kept the “Irish I Were Drinking” sign for myself — because, well, priorities. 😉
The best part? You can customize this project however you like. Choose your own phrases, colors, and designs to make it totally your own.
How To Make Your St. Patrick’s Day Craft
Supplies You’ll Need:
- Wood board – Any scrap wood, craft wood, or even a dollar store sign base works!
- Acrylic paint – I used DecoArt Americana Acrylics Festive Green.
- Vinyl for lettering or designs – If you’re working without a cutting machine, letter stencils or pre-cut stickers can work too.
- Transfer tape – (Optional, but helpful for precise placement.)
- Paintbrush
- Credit card, knife, or bone folder – For smoothing down the vinyl.
- Sealer or clear coat – If you plan to hang it outside or want extra durability.
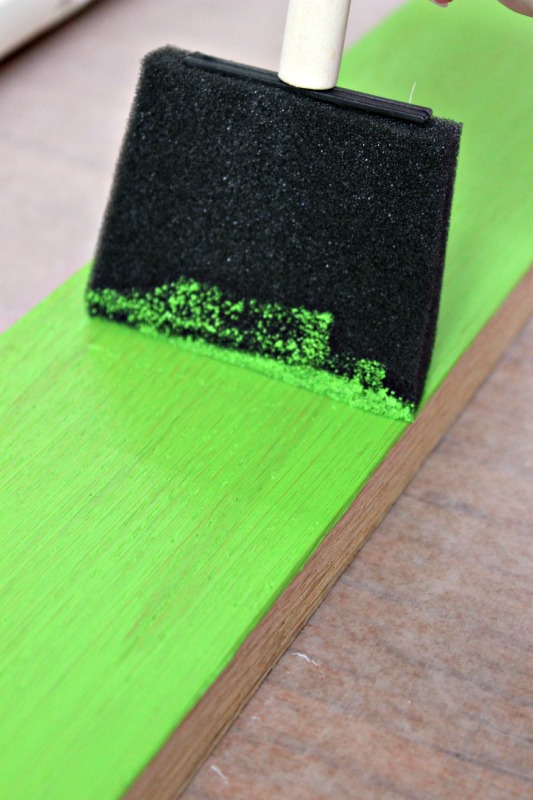
Step 1: Paint Your Wood Board
Let’s start with the easy part—paint!
Grab your board and brush on a solid coat of green (or whatever color screams “lucky charm” to you). I went with DecoArt Americana Acrylics Festive Green because it’s rich, vibrant, and practically yells “Kiss me, I’m Irish!”
For a rustic look, you can dry brush some black or white paint over the top once the green dries. This adds a distressed vibe that’s very “I found this in a charming Irish pub.”
💡Pro Tip: If you want the wood grain to peek through, try watering down your paint just a bit for a lighter wash effect.

Step 2: Create Your Design
Now for the fun part—your phrase or design!
I used my Silhouette Cameo to cut vinyl phrases for my signs, but if you’re flying solo without a cutting machine, you can:
– Print your design on regular paper, trace it onto your vinyl, and cut by hand.
– Use letter stencils and paint your phrase directly onto the board.
– Grab some pre-made sticker letters from the craft store and skip the cutting altogether.
Here are a few fun ideas for sign phrases:
Sláinte! Cheers!
Irish I Were Drinking
Kiss Me, I’m Irish
Shenanigans Welcome
Lucky & Blessed
Step 3: Apply Your Design
If you’re working with vinyl, transfer tape is your best friend for getting your design placed just right.
- Apply the tape directly over your vinyl design.
- Use a credit card, knife, or bone folder to firmly press the design onto the tape.
- Carefully peel the backing off the vinyl (your design should now be stuck to the transfer tape).
- Center your design on the painted wood, press it down firmly, and smooth it with your card or tool.
- Slowly peel away the transfer tape, leaving your beautiful design behind.
💡Pro Tip: If you’re hand-painting your design, use a light pencil outline first for better accuracy.

Step 4: Finishing Touches
Once your design is in place, you can leave your sign as-is, or add a clear sealant for protection — especially if you’re planning to hang it outside.
I recommend Mod Podge Matte or Rust-Oleum Clear Coat for a durable, finished look.

Step 5: Display with Pride
That’s it! Your DIY St. Patrick’s Day Wood Sign is ready to show off.
I made a longer sign for my friend and kept the smaller one for myself — because if you can’t make yourself a funny sign that says “Irish I Were Drinking,” are you even celebrating St. Patrick’s Day properly?

Extra Ideas to Expand Your Crafting Fun:
If you’re feeling inspired, here are a few more easy St. Patrick’s Day DIY ideas you can mix in for extra festive flair:
1. DIY St. Patrick’s Day Garland
Cut shamrocks from cardstock or felt and string them on twine for a cute garland to match your wood sign. Bonus points if you add gold coins between the shamrocks for some extra sparkle.
2. Lucky Mason Jar Centerpieces
Paint mason jars green or gold and fill them with faux gold coins, chocolate coins, or even fresh flowers in shades of white, green, or orange. Perfect for table decor or as a fun gift idea.
3. Irish-Themed Mocktail Bar
If you’re hosting a party, set up a cute mocktail bar with green drinks, fun shamrock straws, and festive drink stirrers. You can check out my Irish Mocktail Recipe on Instagram for inspiration!

You May Also Like


3 comments