Okay, I’ll admit it—I technically made this project last Halloween, but since I didn’t blog it at the time, it’s totally fair game now! Plus, you’ll have to forgive the not-so-professional photos because I tackled this before picking up a few blogging and photography tricks. That said, I’m still proud of this project, and I think you’ll love how simple (and fun) it is to create your own Halloween Subway Art.
PSST – I use affiliate links on my website, from Amazon as well as others – this means if you click my links, I may earn a little money at no cost to you! I appreciate your support of my blog, and if you have questions, you can see my disclosure policy here. Thank you!!

When I first got my Cricut, one of my must-buy items was an electronic cartridge called Word Collage. (This makes me a dinosaur 🦖 in Cricut world, lol.) It has a ton of fun designs, but naturally, I started with the Halloween one. This was back before I knew about fun techniques like freezer paper stenciling or using vinyl, so I used cardstock and some careful painting techniques to bring this art piece to life. Let’s walk through how I did it!

What You’ll Need:
- Small paint brushes (or sponges if you want a smoother look)
- Cricut machine (I used the Cricut Explore)
- Halloween word collage design (I believe you can find this in Design Space still, or there’s this one on Amazon)
- Heavy cardstock (to create your stencil)
- Acrylic paint in black and orange (or whatever color scheme you prefer)
- Canvas (any size you like—mine was 12×12)
- Painter’s tape
Step-by-Step Instructions:
- Start with the Design: I went with a Halloween word collage design on my Cricut cartridge, but you can choose whatever suits your style. Using your Cricut machine, cut the design out of heavy cardstock. The cardstock will serve as your stencil, so make sure it’s thick enough to hold its shape.
- Prep the Canvas: Lay your canvas on a flat surface and make sure it’s clean and ready to go. If you’re like me and have a few projects lying around, double-check for stray glitter. (Or don’t—it is Halloween, after all.)
- Position the Stencil: This part requires a little finesse. Carefully place your cardstock stencil onto the canvas and secure it with painter’s tape. Take your time positioning the stencil to avoid weird angles and make sure the letters sit flat against the canvas to minimize paint bleed.
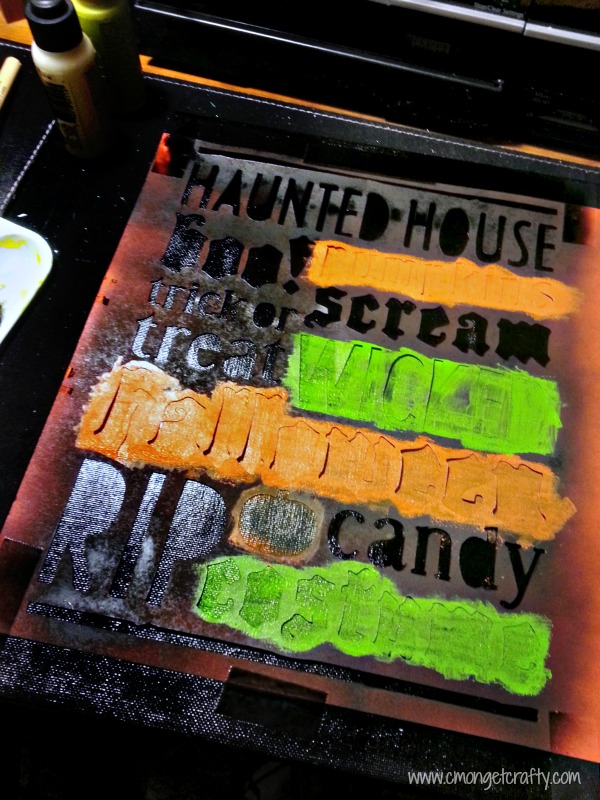
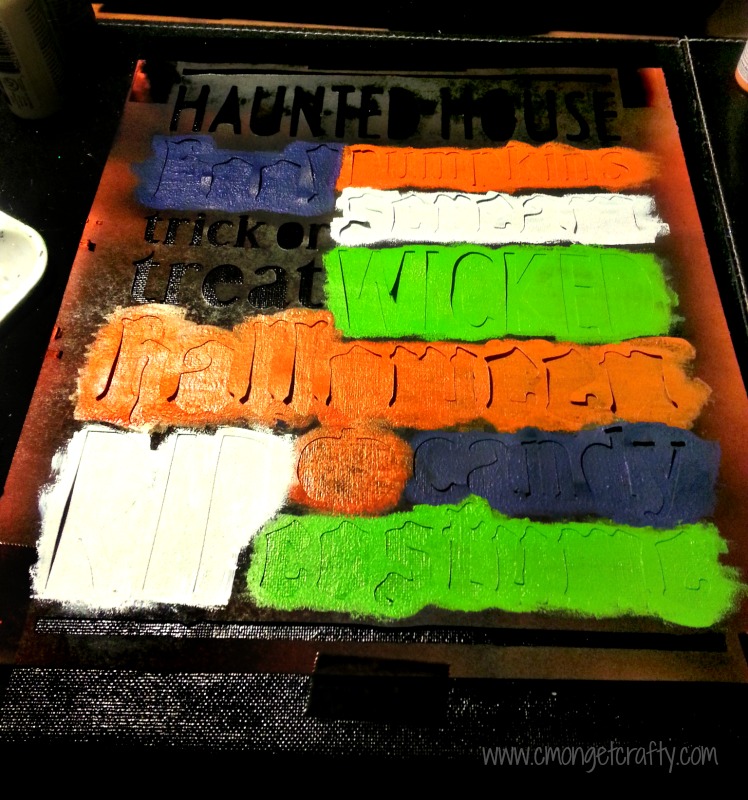
- Time to Paint: Grab your acrylic paint and small brushes. Lightly dab the paint over the stencil using a sponge or a brush—whatever gives you more control. The key here is patience. Don’t go heavy with the paint at first, or it will bleed through (trust me on this one). Slow and steady wins this race.
- Fix Any Bleed-Through: Depending on your stencil’s thickness and how careful you were, you might have a few spots where the paint sneaked under the edges. Don’t sweat it. Use a small brush to touch up any areas that need it. After all, it’s a Halloween sign—perfection isn’t a requirement!
- Let It Dry: This is the hardest part if you’re like me and hate waiting. ⌚Let the paint dry completely before peeling off the stencil. If you rush this step, you risk smudging your design, and no one needs that stress.
- Admire Your Work: Once the paint is dry, carefully remove the stencil. Step back, and give yourself a pat on the back—you just created some pretty awesome Halloween decor! This is the part where you take a photo for Instagram (before your kids or pets knock it over).

Lessons Learned (AKA What I Would Do Differently Next Time)
Back when I first made this, I hadn’t yet discovered the joys of freezer paper stenciling or using vinyl with my Cricut. Using cardstock got the job done, but if I were to do it again, I’d probably opt for vinyl—it’s sturdier and less prone to bleed-throughs. That said, cardstock works in a pinch if you’re patient and careful.
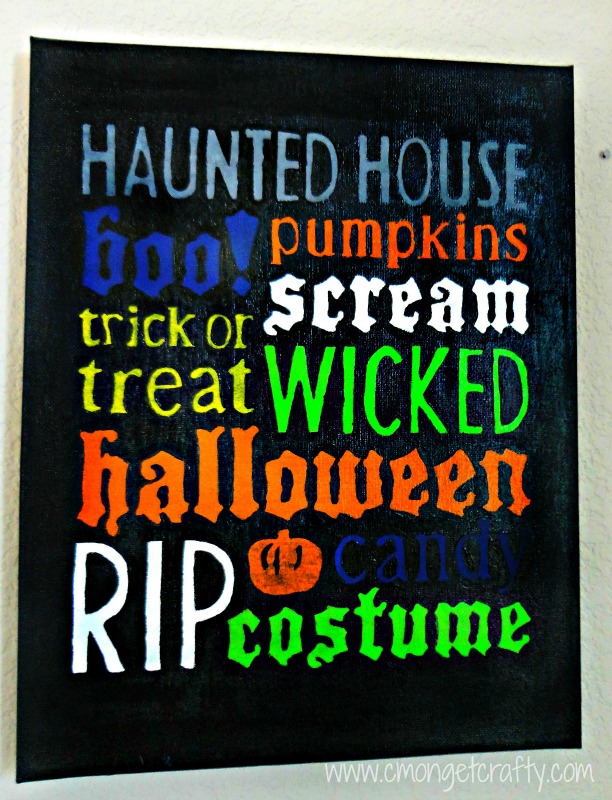
The final piece had a few spots that needed touch-ups, but overall, it turned out great. I even ended up selling it in my Etsy shop (that I had at the time), so clearly, someone else liked it too!

Pro Tips to Make Your Project Easier:
Practice with Freezer Paper Stencils: If you’re feeling adventurous and have some extra freezer paper lying around, give stenciling with it a try. It’s a bit more forgiving and can be ironed onto the canvas for a tighter seal.
Take Your Time with the Stencil: Positioning the stencil securely is half the battle. Use painter’s tape generously to keep everything in place. You’ll thank me later.
Use a Sponge for Smoother Results: While brushes are fine, sponges give a more even application and help reduce bleeding. Just dab gently to avoid pushing paint under the edges.

What kind of decorations do you like to put out for Halloween?

